
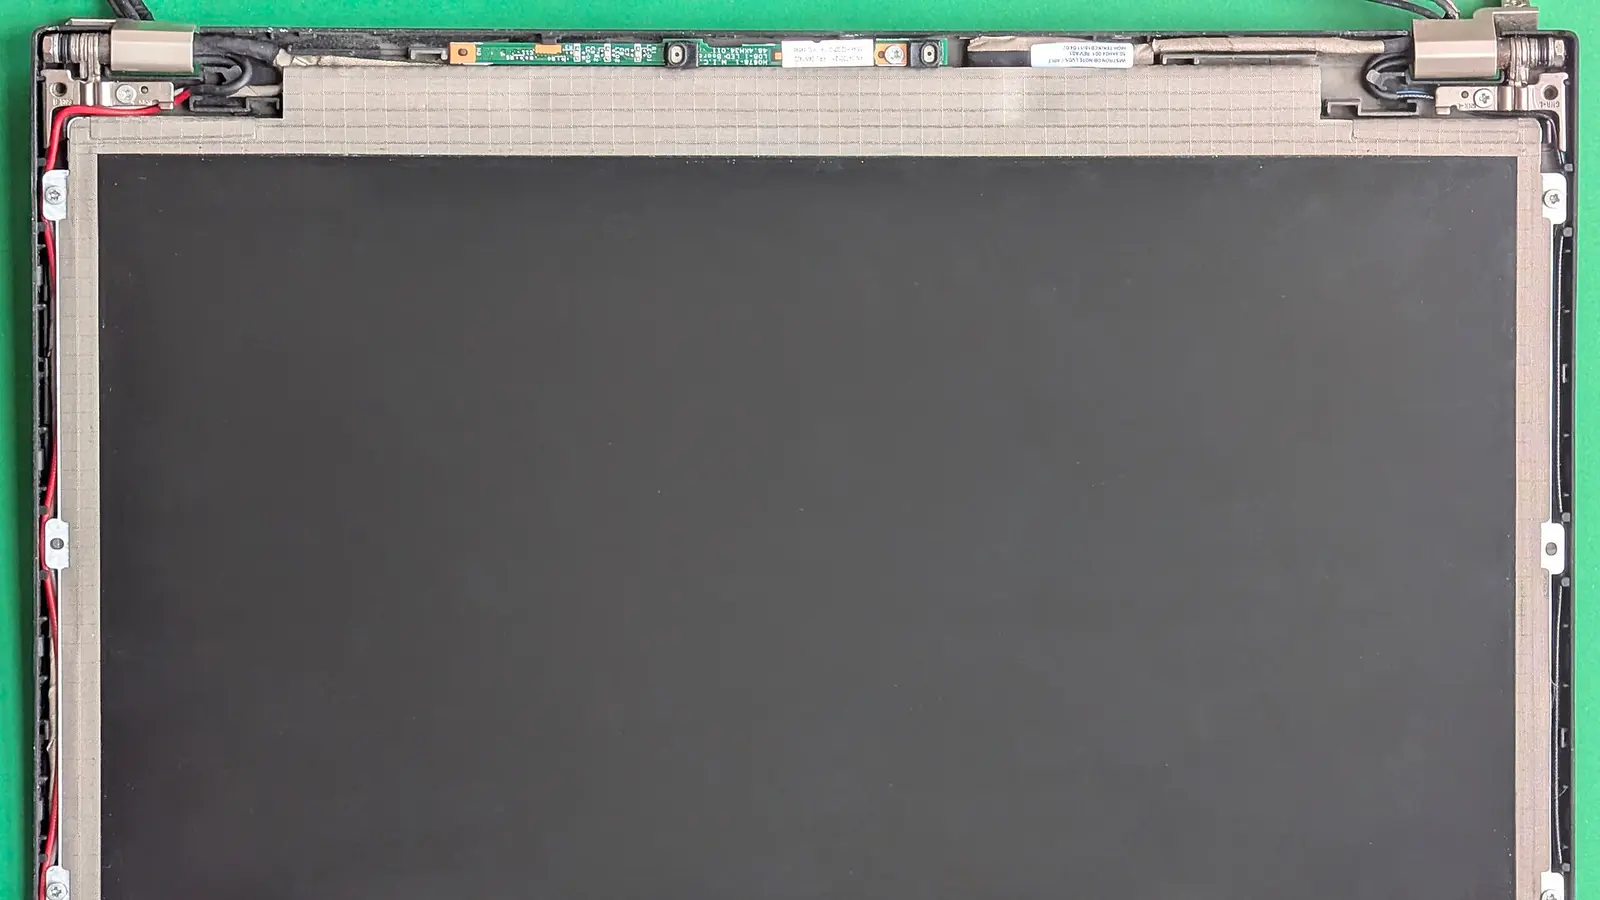
A laptop screen replacement is possible as a DIY job on some conventional laptops, but it is not one universal procedure: makers publish model-specific steps, and some displays need adhesive handling, alignment, diagnostics or calibration. Before buying a panel, decide whether the fault is the panel, cable, hinge, touch layer or main board, then compare the risk of opening the lid against paying a trained repairer.
What laptop screen replacement involves
The part you see as “the screen” may be a bare LCD panel, a touchscreen display module, or a full lid assembly with hinges, cables and antennas. That is why the correct repair path depends on the exact model, not just the screen size.
Microsoft’s Surface service area is a good example of why model-specific instructions matter: it lists separate guides for many Surface Laptop and Surface Pro models rather than one universal display procedure. Apple also tells owners to read the repair manual first so they understand the steps, parts, tools and materials before ordering anything.
On a more serviceable business laptop, the work may involve removing the lower cover, disconnecting the battery, releasing display cables and hinge screws, then lifting the display assembly away. Dell’s Precision 5530 manual, for example, begins its display assembly removal with the base cover and battery already removed, then covers Mylar tape, a display cable, a bracket, cable routing clips, hinge screws and reinstallation in reverse.
On slim, touch or tablet-style machines, the job can be closer to phone or tablet repair. Microsoft’s Surface Pro display module process lists bonding frames, spring clamps, a foam pad, display bonding weights and a debonding tool. It also says not to use a heat gun or hair dryer to debond that display.
First decide what has probably failed
Do not buy a panel just because the picture looks wrong. A display fault can come from the LCD itself, the display cable, the hinge area, the touch layer, the main board or a bonded glass assembly. Use the pattern of the fault to narrow the repair you ask about.
| What you see | Possible area | Next question |
|---|---|---|
| Cracked image or glass | Panel or module | Bare panel or full lid? |
| Touch fails only | Touch layer | Separate or bonded? |
| Image cuts near hinge | Cable or hinge | Cable damaged? |
| Lid sits unevenly | Hinge or assembly | Hinge screws aligned? |
| After Mac repair notice | Calibration | Repair Assistant run? |
If the lid is bent, the hinge has seized, or the glass is bonded to the display, a panel-only order may not solve the problem. Some procedures require new adhesive strips; HP describes replacing a display panel with new adhesive strips, alignment tools, bezel snapping, temporary spacer strips and adhesive setting time. Lenovo also says new tape should be ordered for an LCD panel replacement in its ThinkPad maintenance manual.
Mac users should also factor in post-repair software. Apple says Repair Assistant retrieves calibration information after a Mac repair and completes part calibration, and that macOS can show a notification if a qualifying part is not calibrated. Supported MacBook Pro years include display repair as a qualifying part.
Tools and safety you should not skip
A small screwdriver set is not enough for every screen repair. Depending on the model, the tool list may include anti-static protection, non-metal prying tools, alcohol for adhesive cleaning, tweezers, picks, alignment gauges and calibration software.
- Anti-static protection: Dell instructs technicians to use an ESD field service kit and place removed parts on an anti-static mat. ESD means electrostatic discharge, a small static shock that can damage electronics.
- Correct driver type: Microsoft lists a 5IP Torx Plus screwdriver for Surface Laptop 13-inch AB Cover display replacement, while another Surface Pro display process lists a Torx Plus driver.
- Plastic tools: Microsoft lists plastic ESD-safe tweezers and a plastic ESD-safe spudger for the Surface Laptop 13-inch display procedure. A spudger is a non-metal tool used to lift connectors and pry gently.
- Alcohol and cloths: Microsoft lists 70% IPA for one Surface Laptop procedure and 91% or greater IPA with a lint-free cloth and cleaning swab for the Surface Pro display module process. IPA means isopropyl alcohol.
- Adhesive tools: HP and Lenovo procedures describe adhesive tape removal with tweezers. Microsoft’s Surface Pro procedure includes a bonding frame, foam pad and display bonding weights.
- Diagnostic media: Microsoft’s Surface Pro process lists a USB drive with Surface Diagnostic Toolkit and requires running Touch Display Setup before replacement.
Stop and ask a technician if the battery area is swollen, the hinge is seized, the glass is heavily shattered, the display is bonded, or the manual calls for calibration equipment you do not have. Do not substitute a heat gun or hair dryer where the maker says not to use one.
Before opening the machine, Dell’s safety instructions say to turn off the system and peripherals, disconnect AC power and network or telecom cables, remove jewellery such as watches, bracelets and rings, and make sure a wrist strap contacts bare metal rather than a painted surface. If you are not confident about battery handling, read a safety-focused battery guide first: Laptop Battery Replacement: Can You Do It Safely?.
The usual replacement flow
Exact steps must follow your model’s manual, but most screen work follows a similar logic: make the laptop safe, open only what the manual requires, disconnect the display path, change the panel or assembly, then test before final closure.
- Find the exact service instructions. Use the maker’s manual for your model. Microsoft, Dell, HP, Lenovo and Apple all publish model-specific service or repair material for at least some machines.
- Prepare the machine safely. Power it off, disconnect external power and cables, remove jewellery, and use anti-static protection as Dell describes.
- Remove the required covers first. Dell’s Precision 5530 display assembly procedure starts after the base cover and battery have been removed.
- Expose the display panel or assembly. On Lenovo’s ThinkPad E14 Gen 4 and E15 Gen 4 procedure, the LCD unit and LCD bezel assembly are removed before the panel is released.
- Release adhesive slowly. Lenovo says to grasp the ends of four elastic adhesive tapes with tweezers and pull each slowly until released, warning not to pull too fast because the tapes may snap.
- Disconnect the display cable carefully. HP describes lifting cable tape, rotating a locking lever and disconnecting the cable. Dell describes releasing Mylar tape, disconnecting the display cable and unrouting cables from clips.
- Move hinges only as instructed. Dell’s Precision 5530 procedure removes six M2.5 x 5 hinge screws before lifting the display assembly away, and installation aligns hinge screw holes before reinstalling the six screws.
- Align before tightening. Microsoft’s Surface Laptop 13-inch procedure includes aligning the replacement cover, checking gaps with feeler gauges and tightening hinge screws only after alignment.
- Run validation or calibration. Microsoft includes post-install validation and calibration in its Surface Laptop procedure. Apple’s Repair Assistant may be needed after a qualifying Mac display repair.
- Test before snapping everything shut. If the model uses a bezel, cable lock or adhesive, confirm the image and touch function before final pressure is applied.
Bezel means the front frame around the display. On many newer laptops it is thin, clipped, taped or glued, so forcing it can turn a panel job into a full lid repair.
How to match the correct screen
Compatibility is where many DIY repairs go wrong. Lenovo tells service personnel to replace a field replaceable unit only with the correct model and part number, and to use service-parts lookup for the correct FRU. FRU means field replaceable unit: the part number used for a service part.
When asking for a compatibility check, send clear information rather than only the laptop brand. For LaptopClinic.sg enquiries, use /contact and include what you can identify safely without dismantling beyond your comfort level. LaptopClinic.sg is an online store with no public walk-in counter, so photos and part details matter.
- Full laptop model name from the bottom cover, firmware screen or maker support page.
- Any service tag, serial number or machine type shown on the unit.
- Photos of the broken display area and hinge area.
- Panel label photos if the panel is already safely removed.
- Whether the screen has touch input.
- Whether the glass and LCD appear bonded as one module.
- Resolution, finish and refresh-rate information if shown in your laptop specification.
- Connector position, bracket style and mounting-tab layout if visible.
The last few details are especially important when two panels look similar from the front. A wrong connector position or bracket layout can stop installation even if the size appears right.
DIY or technician: the practical decision
DIY makes the most sense when the model has a documented, panel-level procedure, the bezel is not heavily glued, the hinge area is undamaged, and you already have the correct tools. Paying a technician makes more sense when the display is bonded, the lid is bent, the laptop is needed for work or school immediately, or the procedure requires post-repair calibration you cannot perform.
Apple is direct that Self Service Repair is intended for people experienced with the complexity of electronic-device repair. Lenovo’s service information also says only certified and trained personnel should service the computer. Those statements do not mean every owner is incapable; they mean you should treat the repair as precision electronics work, not as a simple cover swap.
For Microsoft Surface devices, pay close attention to the exact model. One Surface Laptop procedure lists ordinary-looking items such as a soft ESD-safe mat, anti-static wrist strap, Torx Plus screwdriver, tweezers, IPA, spudger, feeler gauges and guitar picks. A Surface Pro display module procedure, however, adds bonding equipment and specifically requires Touch Display Setup before replacement.
For Dell, HP and Lenovo business laptops, a manual may make the work more approachable, but the small details still matter: cable tape, locking levers, adhesive strips, screw order, hinge alignment and bezel clips can all decide whether the repair ends cleanly.

Risks that can cost more than the panel
The common risks are not dramatic; they are small mistakes. Pulling adhesive too quickly can snap it, as Lenovo warns. Tightening hinges before the lid is aligned can leave poor gaps, which is why Microsoft’s Surface Laptop process checks gaps before final tightening. Forgetting calibration can leave a Mac repair unfinished in macOS.
Electrical safety is another risk. Dell’s precautions cover power disconnection, ESD protection, anti-static mats and jewellery removal because the work happens close to internal electronics. Battery safety matters too: Microsoft tells readers to review repair safety and battery safety guidance before starting Surface work.
The warranty and future-service question depends on the maker, model and service terms. Before opening a laptop that is still covered by a plan, check the maker’s repair policy for your exact machine. If you are unsure, do not remove adhesive, labels or internal parts until you have confirmed what future service may require.
Questions and answers
Can I replace the screen myself?
Sometimes. If your exact model has a documented panel procedure, the lid and hinges are not damaged, and you have the required tools, DIY may be realistic. If the screen is bonded, touch-enabled, a Surface Pro-style module or a Mac display that needs calibration, a technician is usually the safer route.
Do I need the panel or the whole display assembly?
If only the LCD panel is damaged and the lid, hinges, cable and bezel are sound, a panel may be enough. If the hinge area is bent, the glass is bonded, the cable is damaged, or the maker procedure treats the display as a module, you may need a larger assembly.
What tools are normally needed?
Depending on the model, you may need anti-static protection, the correct Torx Plus driver, plastic spudgers, tweezers, opening picks, IPA, lint-free cleaning materials, adhesive strips, alignment gauges and diagnostic or calibration software. Always follow the model’s manual.
Why does touch or OLED make the job harder?
Touch displays are often modules rather than simple panels, and some procedures include bonding, adhesive removal and calibration steps. The same caution applies to premium slim displays where the glass, panel and lid may be integrated.
Will a MacBook display work after fitting?
It may need a software finish step. Apple says Repair Assistant retrieves calibration information after a Mac repair and completes part calibration; macOS can show a notification if a qualifying part is not calibrated.
Sources
- Microsoft: Surface Service Guide Center
- Microsoft: Surface Laptop 13-in Component Disassembly and Reassembly
- Microsoft: Surface Pro 11th Edition with 5G and Pro 10 with 5G for Business Component Disassembly and Reassembly
- Dell: Precision 5530 Service Manual
- Dell: Precision 7750 Service Manual - Safety precautions
- HP: Maintenance and Service Guide
- Lenovo: ThinkPad E14 Gen 4 / ThinkPad E15 Gen 4 Hardware Maintenance Manual
- Lenovo: Before replacing FRUs
- Apple: Self Service Repair
- Apple: Use Repair Assistant to finish a Mac repair